
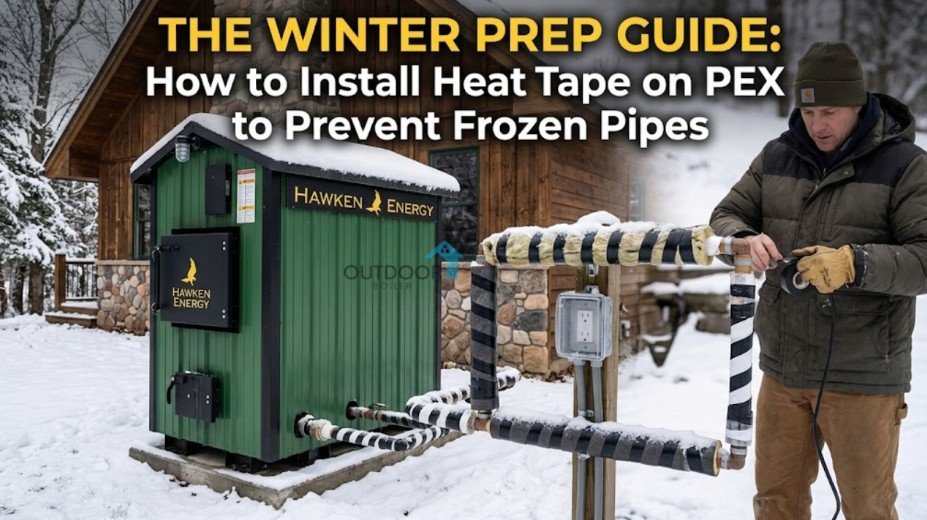
The Winter Prep Guide: How to Install Heat Tape on PEX to Prevent Frozen Pipes
Installing heat tape on PEX pipes is an effective way to help prevent freezing during cold weather, provided you use a heat tape that is approved for plastic piping and install it according to the manufacturer’s instructions. Proper installation, insulation, and regular inspection all work together to reduce the risk of frozen or burst pipes.
Why Frozen PEX Pipes Are Still a Concern
Many homeowners believe that PEX piping cannot freeze because it is more flexible than traditional copper or steel pipes. While PEX is less likely to crack when water freezes inside it, it is not completely freeze-proof.
When water freezes, it expands. If enough ice builds up inside a PEX pipe, water flow can stop completely. Repeated freezing and thawing can also weaken fittings, connectors, and valves over time. In severe cases, frozen sections may still lead to leaks or expensive repairs.
That is why protecting exposed PEX pipes before winter arrives is an important part of home maintenance.
What Is Heat Tape?
Heat tape, sometimes called a heating cable, is an electrical cable designed to keep pipes warm enough to prevent water from freezing.
Some heat tapes produce a constant amount of heat, while others are self-regulating. Self-regulating heat tape automatically adjusts its heat output based on the surrounding temperature, making it a popular choice for residential plumbing.
Not every heat tape is compatible with PEX piping. Always check the product label to confirm that it is approved for use on plastic pipes before installation.
When Should You Install Heat Tape on PEX?
Heat tape is most useful when PEX pipes are located in areas exposed to freezing temperatures, such as:
- Crawl spaces
- Unheated basements
- Garages
- Exterior walls
- Mobile homes
- Seasonal cabins
- Outdoor water supply lines
If your pipes are already inside heated living spaces, additional heat tape is often unnecessary.
Materials You Will Need
Before getting started, gather the following supplies:
- Heat tape approved for PEX piping
- Pipe insulation
- Electrical tape recommended by the heat tape manufacturer
- Measuring tape
- Clean cloth
- GFCI-protected electrical outlet
- Safety gloves
Having everything prepared beforehand makes the installation process much easier.
Step-by-Step Guide to Installing Heat Tape on PEX
Step 1: Turn Off the Water if Necessary
Although installing heat tape usually does not require disconnecting plumbing, shutting off the water can provide extra peace of mind while working around exposed pipes.
Step 2: Inspect the PEX Pipe
Carefully examine the pipe for cracks, leaks, loose fittings, or signs of damage.
Heat tape should never be installed over damaged plumbing. Repair any issues before continuing.
Step 3: Clean the Pipe Surface
Wipe the pipe with a dry cloth to remove dirt, dust, or moisture.
A clean surface helps the heat tape make better contact with the pipe.
Step 4: Position the Heat Tape
Follow the installation pattern recommended by the manufacturer.
Depending on the product, you may:
- Run the cable straight along the pipe.
- Wrap it in a spiral pattern.
- Position multiple runs on larger diameter pipes.
Avoid crossing or overlapping the heating cable unless the manufacturer specifically allows it. Overlapping can create excessive heat and may damage both the cable and the pipe.
Step 5: Secure the Heat Tape
Use only the tape or fasteners recommended in the installation instructions.
Avoid using metal fasteners, nails, or wire since these can damage the heating cable.
Step 6: Cover with Pipe Insulation
Once the heat tape is secured, install foam pipe insulation over both the pipe and the heating cable.
Insulation helps retain heat, improves energy efficiency, and allows the heat tape to work more effectively.
Step 7: Connect to Power
Plug the heat tape into a properly grounded GFCI-protected outlet.
If your heat tape includes a built-in thermostat, position the thermostat exactly as instructed by the manufacturer so it can accurately monitor the pipe temperature.
Step 8: Test the System
After plugging it in, verify that the heat tape is operating correctly.
Many products become warm only when temperatures drop below a certain point, so follow the manufacturer’s testing procedure rather than expecting immediate heat.
Common Mistakes to Avoid
Even a quality heat tape can become ineffective if installed incorrectly. Some common mistakes include:
- Using heat tape that is not approved for plastic pipes.
- Crossing or overlapping the cable.
- Installing heat tape over damaged piping.
- Forgetting to insulate the pipe afterward.
- Using extension cords not intended for outdoor or continuous use.
- Ignoring the manufacturer’s installation instructions.
Taking the time to install the product correctly helps improve both safety and performance.
Additional Ways to Prevent Frozen Pipes
Heat tape is only one part of winter pipe protection.
You can also reduce the risk of freezing by:
- Sealing air leaks around foundations and exterior walls.
- Keep garage doors closed when plumbing is nearby.
- Opening cabinet doors beneath sinks during extremely cold weather.
- Allowing faucets to drip slowly during a severe cold.
- Maintaining adequate indoor heating.
- Disconnecting outdoor hoses before freezing temperatures arrive.
Combining these practices provides better protection than relying on a single solution.
Is Heat Tape Safe for PEX?
Yes, heat tape can be safe for PEX pipes when it is specifically designed for plastic piping and installed according to the manufacturer’s instructions.
Modern self-regulating heating cables are designed to reduce the risk of overheating by automatically adjusting their heat output. However, improper installation, damaged cables, or using incompatible products can still create safety hazards.
Always read the installation guide before use and inspect the heat tape each season for signs of wear.
How Long Does Heat Tape Last?
Most quality heat tapes can last several years with proper installation and maintenance.
Before each winter season, inspect the cable for:
- Cracks
- Frayed insulation
- Loose connections
- Damaged plugs
- Signs of overheating
Replace any damaged heat tape immediately rather than attempting repairs.
Frequently Asked Questions
Can you wrap heat tape directly around PEX?
Yes, but only if the heat tape manufacturer specifically states that the product is approved for use on PEX or other plastic pipes.
Should PEX pipes still be insulated if heat tape is installed?
Yes. Pipe insulation helps retain heat, improves efficiency, and reduces electricity usage while providing additional freeze protection.
Does heat tape stay on all the time?
Some models operate continuously while plugged in, while self-regulating models automatically adjust their heat output according to surrounding temperatures.
Can heat tape prevent every frozen pipe?
No. Heat tape significantly reduces the risk, but proper insulation, correct installation, and adequate home heating remain essential.
Is professional installation necessary?
Many homeowners can install heat tape themselves by carefully following the manufacturer’s instructions. However, if electrical work or complicated plumbing is involved, consulting a qualified professional is a good idea.
Final Thoughts
Installing heat tape on PEX pipes is one of the most practical ways to reduce the risk of frozen plumbing during winter. Choosing a product designed for plastic pipes, installing it correctly, adding insulation, and inspecting it each season can help protect your home’s plumbing system when temperatures fall.
We regularly create practical home maintenance articles like this to help homeowners make informed decisions. Be sure to explore the rest of our website at outdoorboiler.com. For more expert tips and seasonal maintenance guides that we have written to keep your home protected throughout the year.